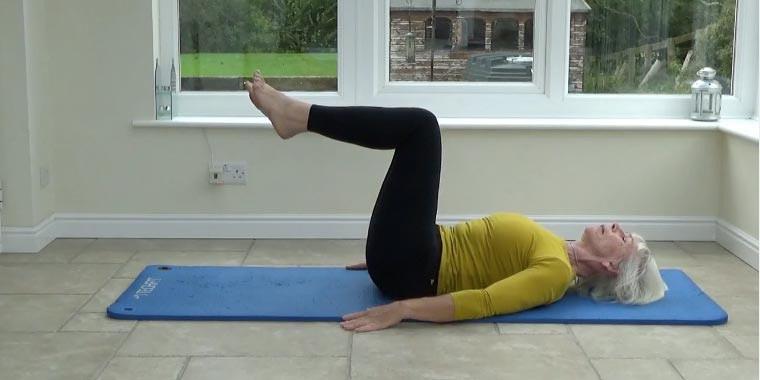
The 3-session course is aimed at those who have done some Pilates in the past, but have let their Pilates lapse. It may be the New Year that has re-awakened your interest in Pilates, or just that you want to get fitter and suppler again.

Perhaps you just haven’t done Pilates for a few of weeks but you are already feeling a lot stiffer, or perhaps it is several years since you have seen a Pilates mat.  Whatever the case this course will help ease gently back in to Pilates.

Around 60 mins of video instruction.

If you’ve already already purchased this course or have an active subscription you can access your course here

This is a short 1 minute sample of the video series

This 5-day course is designed to help free tight hips and reduce back pain. The sessions are approximately 15 minutes long, so they can easily be fitted in to a busy day.

Although you should start to feel some benefits at the end of the first 5-days, you will experience better results if you repeat the course, each week for 4 weeks.

You will actually need a couple of props to help with some of the movements. The first is a yoga or pilates block – around 6 inches  x 10 inches – which can be found available on AMAZON and the second a resistance band (or a pair of tights).

Around 83 mins of video instruction.

If you’ve already already purchased this course or have an active subscription you can access your course here

This is a short 1 minute sample of the video series

Whilst this new 5-day Pilates workout is aimed at horse-riders, the course is suitable for anyone who has tight hips and/or hamstrings, or a weak core and wants to improve their balance and posture.

No previous Pilates experience is necessary, although those new to Pilates may find some of the exercises challenging, so some easier modifications are offered.

Although each session focuses on a specific area, as always with Pilates, your attention is drawn to your alignment and using your core muscles.

Each session is approximately 20 minutes long, so most horse owners will be able to fit them into their busy lives. Do a session a day for 5-days and you will start to feel the difference. Do the course, weekly for a month and not only will you see a huge difference your horse will feel it too!

Like most of my Pilates courses this one is mat-based, although you may want to have a few props to hand. These include 2 x tennis balls (or spikey balls), for “flossing your glutes”, a Pilates block (or large book/s) to increase the stretch in your hamstrings in The Bridge and a small rolled towel to help you with the Roll Up if you have weak abdominals.

Around 100 mins of video instruction.

If you’ve already already purchased this course or have an active subscription you can access your course here

This is a short 1 minute sample of the video series

Aimed at Intermediate level students, June’s 5 day workout focuses on the upper back, arms and shoulders as well as increasing the number of reps of several of the exercises to help improve your stamina.  Although the emphasis is on the upper body, this course will provide a fun whole body workout.

Around 71 mins of video instruction.

If you’ve already already purchased this course or have an active subscription you can access your course here

This is a short 1 minute sample of the video series

This 5-Day Rider’s Workout focuses on the 4 main “problem areas” for horse riders. The core (abdominals, obliques, lower back and glutes), tight or uneven  hips, tight hamstrings, and finally the shoulders and upper back. 

Done daily, you will start to see a difference in both your posture and the way you can move your body. Done every day for a month, you will really experience a huge difference and your horse will thank you!

As always in Pilates , there is also considerable emphasis in each session on how to achieve correct alignment. Body awareness is key to being able to ride well.

The sessions are about 20  minutes, or so, which should  allow you to fit them in to a busy  day and not compromise your riding time. Do one session a day and on the 6th day combine your favourites together to make a longer workout.

During the fifth session a Swiss Ball is incorporated as  part of the workout. Using a Swiss Ball adds a new dimension to your exercise programme  and gives important feedback as to whether you are sitting in balance. However, if you haven’t got a Swiss Ball the exercises can be done sitting on a hard chair or even standing up.

Around 100 mins of video instruction.

If you’ve already already purchased this course or have an active subscription you can access your course here

This is a short 1 minute sample of the video series

By now we have all heard that Pilates is really good for us. When done regularly the benefits of Pilates are numerous, including strengthening our core muscles, which in turn helps our back to become stronger. In addition Pilates teaches us body awareness, makes us more supple and can help reduce postural related pain.

What you may not have heard of is that “ Pilates” exercises for horses can offer them similar benefits. I normally begin an exercise that is new to my horse in hand or on-line, but all these exercises can be done under saddle too – and for the purpose of this article, I am going to describe the ridden versions.

Single Loop Serpentine

This exercise helps the horse loosen up without stress. It helps mobilize the shoulders which can release blockages in the neck and poll. The horse should become softer in the jaw, more flexible through the neck and back and more willing to accept contact.

  • Starting on the right rein, ride on the inside track (slightly off the rail). Leave the track at M and perform a single shallow loop to the 5m or 6m line, returning to the track at F. Repeat the maneuver on the other long side, leaving at K and returning at H.
  • Start with a loose rein and only progress to a shorter rein as your horse softens.
  • Start at a walk, progressing to a sitting trot once your horse is going well and knows the pattern.
  • Really work on the bend, switching from bending inside, to outside, to inside etc.
  • If your horse does not respond to the aids for a shallow turn, add in a small circle in that direction before continuing with the serpentine.
  • Repeat on the other rein.

Single Loop and Leg Yield

With this exercise you address the four corners of the horse, mobilizing the shoulders, rib cage and pelvis.

  • Starting on the right rein, ride on the inside track (slightly off the rail). Leave the track at M, by moving the outside shoulder to the inside, as though riding a normal single loop. 
  • As soon as you have left the track, change the bend from right to left and leg yield a few steps with your horse slightly bent to the left. 
  • Just before reaching the half way point of the school (in a line with B) ride a few steps straight on a single track.
  • After crossing  the half-way point move the right shoulder toward the fence and then change the bend and leg yield back to the  inside track, reaching it just before F.
  • Start with a loose rein and only shorten the reins as your horse gets softer. Try the exercise at a walk before progressing to sitting trot.

Twenty Metre Circle with Voltes

This exercise helps improve balance, as well as increasing your horse’s softness and flexibility. It targets the shoulders, rib cage and abdominal muscles by stretching the muscles on the outside of the bend.

Mark a 20 metre circle with a 10 metre volte at each of the circle points. The best way to mark a circle is to set a gateway of cones at each of the circle points (these circle points being the equivalent of 12, 9,6 and 3 ‘o’ clock). The more accurate the circle and voltes are the more benefits the exercise will have. I always use a tape measure to set out my circles accurately.

  • Start working at a walk and progress to a trot when you and your horse are comfortable with the exercise.
  • Walk round the circumference of the 20m circle paying particular attention to whether your horse falls out or in. If you miss the gateway with an outside shoulder then your horses in falling out, if you miss the gateway with an inside shoulder, he is falling in.
  • Try to correct any falling in or out by adjusting your seat or weight. If the horse falls out, try transferring a little more weight to the inside shoulder by doing two or three half halts into the inside front leg. Alternatively try nudging the outside shoulder inwards with your outside knee when the outside front leg is in the air. Use your reins as little as possible as pulling on the inside rein can exacerbate the situation.
  • After you have ridden the 20m circle a couple of times ride on to the first 10m volte. Pay particular attention to whether your horse finds this size of circle more difficult. After riding around the first volte a couple of times resume the 20m circle to the next circle point and ride round the next volte, etc. etc.
  • Repeat on the other rein.

 Riding exercises like these can really benefit any horse. You don’t need to do the exercises for too long, 20 to 30 minutes maximum. However If you do these sort of exercises with your horse on a regular basis you will start to see some huge improvements in your horse’s symmetry.

A simple and effective 5-day workout that is suitable for all levels. Do a class every day for 5 days, or repeat the series each week, for 4 weeks, to really see a difference. The classes are kept short, around 15 minutes or so, so that you can find the time to fit a workout into your busy schedule.

Around 80 mins of video instruction.

If you’ve already already purchased this course or have an active subscription you can access your course here

This is a short 1 minute sample of the video series

The shoulder is one of the most complex joints in the human body and as such is vulnerable to all sorts of problems and injuries. It is a relatively shallow joint in comparison to our hip joint and is extremely dependant on muscle tone for correct alignment and joint stability. Imbalance in any of the muscles that surround the shoulder joint can easily cause postural problems not to mention shoulder pain.

As riders we tend to become aware of our shoulders when a postural fault is pointed out to us by an instructor. Common issues for riders include a) tight shoulders that are pulled up towards the ears, b) one shoulder being carried higher than the other and c) the most common problem of all, tight shoulders that are rounded forward.

Tight shoulders that are carried too high are normally the result of tension. Tight shoulders in the rider can cause pain or stiffness in their neck, back, and upper body as well as blocking the movement of the horse. The shoulders may feel tight and stiff as a result of stress, tension, fear and even overuse. Tight shoulders can be also caused by sitting for extended periods, incorrect sleeping positions, and injuries. Learning to relax the shoulders whilst off the horse and practising breathing control can both help.

With uneven shoulders the discrepancy can be slight or significantly different. The cause can be muscular or structural (as in scoliosis) but invariably the imbalance in the shoulders is caused by the rider collapsing on one side. Becoming aware of your shoulder misalignment is the first important step, not only while you’re riding but also while you are standing or sitting. Whether the cause of your uneven shoulders is muscular or structural,  to correct the shoulder imbalance your body needs to be correctly aligned, with your shoulders the same height and facing forward. To make the changes you will need to work on stretching your “tight” side and strengthening your “long” side. Start using your non-dominant arm as much as you can whilst doing yard work, join a live Pilates class or try an on-demand Pilates classes on-line and if you can, make an appointment with a massage therapist who specializes in myofascial release.

Probably the most common shoulder issue of all, is that of rounded shoulders (also known as upper crossed syndrome), because our modern lifestyle exacerbates this condition. Rounded shoulders, along with a rounded upper back, and a chin that juts forward becomes the norm, so that we are not even aware that this is how we are riding, sitting or standing! To try and correct this issue, riders are frequently told by their instructor, that that need to take their shoulders back. Unfortunately this just doesn’t work, other than momentarily. It is not that you don’t want to do what the instructor says, it is just that your body seems to have a mind of its own and will revert back to its default position within minutes.Whilst rounded shoulders and a head that pokes forward can take the horse onto his forehand, just being told to take the shoulders back, normally results in the rider moving their whole torso behind the vertical in an attempt to comply. Unfortunately, this takes their weight too far back, causing hyperextension in the rider’s lumbar spine and their horse to hollow behind the saddle.

Rounded shoulders don’t just affect us when we are on our horses either. Generally, the posture we have when riding is fairly indicative of the posture we are going to have when we are on the ground or vice versa. There are many reasons why we tend to round our backs and roll our shoulders forwards, and certainly when we are riding the way we hold our reins can be one. However rounded shoulders are normally caused by tight pectoral muscles and weak muscles in the back (upper and lower trapezius, deltoids, rhomboids and latissimus dorsi to name just a few) which are created by your lifestyle. Sitting at a desk all day, using a computer, looking at a mobile phone or even sleeping curled up all cause poor posture, weak back muscles, tight pectoral muscles, tight hip flexors and a weak core.

Having rounded shoulders can present real dangers for your long-term health too. The most common side effect of rounded shoulders, and one you might be already experiencing, is strain and pain. Rounded shoulders put a great deal of stress on the trapezoids, upper back, and neck muscles. At the very best, this can result in general muscle aches, and at the other end of the scale, you might suffer from pain that needs medical intervention. Rounded shoulders can also trigger tension headaches, which can then become more severe, leading to migraine. Rounded shoulders can also lead to arthritis. What might start out as stiffness in the shoulder and neck and an occasional headache can eventually become a limited range of movement and chronic pain. As already mentioned, rounded shoulders put unnecessary strain on muscle tissue, vertebrae, and joints alike, leading to high levels of inflammation which break down the cartilage and lead to degenerative joint disease.Rounded shoulders can also promote further postural distortions throughout the body. Remember that your body is similar to a chain-linked fence, in that if something happens at the top, it’s going to be felt at the bottom too. Having rounded shoulders can increase your chances of developing conditions such as forward head posture, pelvic tilt, and knee problems!

Correcting rounded shoulders can be very hard; in part because our proprioceptive system tells us the way we are standing or sitting is straight, even when it is not, and in part because our muscles, fascia and ligaments are all affected. The only way one can really solve the issue of rounded shoulders is by working on oneself off the horse. You need to strengthen the muscles of your upper back, the rhomboids (between the shoulder blades), the rear deltoids and lower trapezius (back of shoulders, upper back) as well as opening up the muscles in your chest and strengthening the muscles that support your spine. Generally, the more you can build strength in your shoulder girdle and balance that strength from front to back, the more your body will be able to maintain proper shoulder position in a relaxed and supple state.

Whist really correcting upper crossed syndrome will take several months of regular exercise, such as Pilates to strengthen those muscles, becoming self-aware of the issue is a great place to start. When I am working with a rider at a Posture Assessment Session or Clinic, I try to help the student take the “first steps” to correct this issue. Normally, the starting point is to get the rider in reasonable vertical balance by using PI’s weight sensors and cameras so the rider can “see” that they are rounding their shoulders and jutting their head forward or tilting their torso back. Once the rider is basically in balance we can then start to open up their shoulders by stretching their chest and drawing their shoulders backwards and downwards using a simple exercise called “Dumb Waiter”.  This can be done on PI (my electronic horse) or equally, if you have a calm, quiet horse whilst mounted, or whilst standing or sitting on a Swiss Ball. To do the exercise you need to bend your arms at the elbows, bring your upper arms to your sides, and hold your lower arms in front of you, palms upwards. Have your palms as flat as possible (imagine you are holding a small tray on each hand and don’t want to spill the drink on it). On an inhale, open your lower arms to the side, keeping your upper arms by your ribs. You should feel your shoulder blades drop down your back, and your chest open. Hold for a moment and then breathing out; bring your hands back together. You can also use this moment to see if one hand is lower than the other as if it is, it will show you that your shoulder on that side is lower and you are collapsing on that side.

While this exercise frees the shoulders and allows them to be placed back more effectively, it is only a temporary solution. Just stretching is not enough. Without the required strength in the opposing muscles the shoulders will not be able to stay back without a lot of effort, which causes tension. As a rider, you need to place your shoulders correctly but without tension so you need to strengthen those muscles in your back so you can hold the correct posture without strain.

I like to recommend regular Pilates classes to help riders improve their posture and increase body awareness. Done on a weekly basis, or even better several times a week, Pilates can not only correct your shoulder issues but will help you become more stable, balanced and supple in the saddle!

Some simple exercises that can help correct rounded shoulders are given below:

Stretching Over the Ball

From a seated position on a Swiss Ball, walk your feet away from the ball until the small of your back is in contact with the ball. Allow your upper back to drop back so that you are draped over the ball, with your head hanging downwards. Take your arms slowly backwards above your head and then bring them down so that your arms are hanging out to the side, palms upwards.  Breathe deeply and relax your spine and shoulders as you allow the weight of your arms to stretch your chest muscles (when out to the side) or open up your shoulders (when overhead).

Spine Extension

Activates the muscles of your upper-back – a great way to compensate for “computer-posture”. Sit on an exercise ball with your feet a hip’s-width apart. Lift your arms out to either side with and bend your elbows. Now, rotate your arms so that your hands reach towards the ceiling – as though surrendering. Keeping your shoulder blades wide, lift your sternum towards the ceiling by engaging the muscles of your back between your shoulder blades. Hold this small thoracic extension for a count of 10 and then release. Repeat 10 times.

Anterior Deltoid Stretch

Lie down on a foam roller with your entire spine supported (sacrum to skull). If you don’t have a foam roller you can use a rolled blanket, towel, or yoga mat. Bend your knees so your feet are flat on the floor. Bring your elbows to shoulder height, so the upper arms are at right angles to your upper body, and your forearms are parallel to the roller (as in “hands up”). Relax your elbows and wrists toward the floor (they may or may not reach). Try to keep your forearms parallel to the floor; the wrists will want to be further away from the floor than the elbows, but try not to let that happen. You should feel the stretch across the chest muscles and maybe even the fronts of the shoulders. Your elbows and wrists probably won’t touch the floor, but don’t worry about that. Make sure your lower ribs aren’t jutting out. Work on allowing your body to relax and letting your chest and shoulders open for at least five steady breaths.​

Trapezius Stretch and Myofascial Release

Seated or standing, relax your right ear down toward your right shoulder. Keep your shoulders level with the floor; avoid letting one shoulder lift higher than the other. Relax your left arm down, and imagine you’re reaching for something on the floor with your left hand. To amplify the stretch, bring your left hand to the left side of your head to apply gentle pressure. Experiment by slowly lowering and lifting your chin to find a better stretch. If you find a particularly tight spot, hold there and take several relaxed breaths. Repeat on the other side.

Plank with Scapular Retraction  

Assume a forearm or low plank position.  Kneel down on all fours, place your forearms on the floor keeping your elbows bent and directly under shoulders; clasp your hands. Straighten your legs, tucking your toes under and come up into a plank position. Your feet should be hip-width apart, and your elbows should be shoulder-width apart. Contract your abdominals and engage your glute muscles. You should now be in a straight line from head to heels. Hold for a count of 5 before allowing your chest to drop towards the floor and your shoulder blades (scapula) to move towards each other. Then take your chest back up, moving your scapula away from each other. Hold each movement for a count of 5 and repeat 5 times.

A correctly placed and aligned knee prevents knee injury, whether we are on or off our horse. While in the saddle, a correctly placed knee can be used for subtle aids. However, very few people actually spend any time thinking about the positioning of their knees ,until they start to experience knee pain. But what is the correct positioning for riders? Should we be turning our knees in or should we be turning our knees out) And does it matter?

Our knees are designed to act like a hinge, they are not designed to rotate.  The knee likes to move in a bending and straightening way (flexion and extension). It doesn’t like to be kinked, twisted, or rotated. So if you turn your foot into a forward facing or parallel position by rotating at your knee, your knee joint will be compromised and over the years, this pressure will cause the medial collateral ligament to tighten and the lateral ligament to weaken and stretch or even rupture, which puts wear and tear on the joint, and causes arthritis.  Basically to turn our feet into parallel or forward facing position we need to internally rotate our thigh bone at the hip, or more specifically use our hip flexors and gluteal muscles (the muscles in our bottom) to correctly align our knee and foot.

So, on that note, let’s look at some of the common problems I see with knees when I give lessons, as well as some of the reasons why one might get pain in the knees, either during, or after the ride.

1. Incorrect leg position.

When you ride your ankle should be beneath your hip, as in the old adage “ear, shoulder, hip, heel” alignment. Your thigh bone should be rotated in from the hip joint, which allows the flat of your thigh to be in close contact with the saddle, your knee to touch, but not grip the saddle, and your lower leg to hang down the side of the horse, so that the inside of the lower leg can be applied, as and when needed, with an inward (not backward) nudge. To achieve this, your pelvis needs to be in neutral alignment.

Too short a stirrup is a major contributor to knee pain. In addition, stirrups that are too short push your bottom towards the back of the saddle, causing posterior rotation to the pelvis (chair seat), which blocks your hips and forces your lower leg forwards. Stirrups that are too long tend to cause lower back pain rather than knee pain, as they create an anterior tilt to the pelvis (overarched back). However, riding with your stirrups too long tends to encourage the heels to be held too far back, which can cause the knee to creep upwards.

2. Gripping with the knees

Gripping with the knees is very common with riders who are insecure in the saddle, particularly beginners and those who have a weak core. If you grip with your knees to stay on your horse, you will not only have sore knees but will block the movement of your horse, cause stiffness in both your knee and hip joints, as well as push your seat out of the saddle. Gripping with the knees can also make the knees creep upwards. The classical masters all write about how the thigh needs to be turned to lie flat on the saddle, to allow the knee to find the correct position, neither gripping or flapping. Getting the thigh to lie flat takes some effort initially, but can be achieved by by pulling the large inner thigh muscle outwards and backwards with your hand, rotating the leg slightly inward at the hip, so that the muscles lies behind the thigh rather between the bone and the saddle. However to maintain this position easily you may well need to work on opening your hips and strengthening your hip flexors, your core and stretching your psoas. The position of the thigh directly influences the position of the knee and when the thigh and knee are in the correct position, gripping doesn’t happen.

3. Knees turned out

There is a huge difference between taking your knees away from the saddle and turning your knees out. Taking your knees away from the saddle momentarily by lifting your thighs out from the hip is a great exercise. It enables you to check that you aren’t gripping with the legs and whether your pelvis is in neutral,not to mention helping to free the hips. Turning your knees away from the saddle is completely different; it immediately blocks the hip and tenses the gluteal muscles , the biceps femoris (the big muscle at the back of your thigh) and gastrocnmius (big calf muscle). All this results in an insecure seat and encourages excessive and very often involuntary movement of the lower leg. The remedy is the same as mentioned above. Grab hold of your thigh and pull the big muscles backwards and outwards so that the flat of your thigh can rest against the saddle. If your thigh is right, your knee is also right.

4. Rotating at the knee

We have probably all been told at some time or another that our feet should be more or less parallel to the horse’s sides, but we haven’t necessarily been told how to achieve this. If the big muscle at the back of your thigh is between your femur (thigh bone) and the saddle, your knees will naturally be facing outwards. To counter this, it is common for riders to rotate their lower leg and foot forward by twisting or rotating at their knee. Apart from the fact that this pretty much guarantees that you will suffer from knee pain when you ride, and long term damage to the knee in later life, the incorrect placement of the thigh blocks your hips and prevents you from being able to follow the movement of the horse.

5. Knees creeping up

Another common problem for riders are knees that creep up. Normally our knees start to creep when we start to grip with them. This often occurs due to insecurity in the saddle, this can be as simple as a weak core but If your stirrups are too long and you have to reach for them, you will probably tense your legs when your horse starts moving or goes up a gait. As the thighs start to tighten, the knees rise and the hips lock. Another reason why the knees creep up can be a tightness in the psoas muscle. Apart from strengthening our core and stretching our psoas off horse, with Pilates exercises, one can also think about trying to capture the feel of kneeling when you ride to encourage your hips to open, and your knee to stay down and still.

 6. Feet too far in the stirrup

According to the International Society of Rider Biomechanics your stirrups should be positioned beneath the balls of your foot. This is great advice, as the positioning gives your foot support yet still allows the ankle to be supple, and soft, which keeps the knee soft and supple. More experienced riders may have just their toes resting in the stirrup, which also allows the ankle to be soft and supple. The Spanish Riding School traditionally taught that there should be so little weight in the stirrups that it should look like a puff of wind could blow them away. The one thing in common with both of these practices, is that the positioning allows the ankle to flex with the horse’s movement, which in turn allows the knee to flex. If you jam your feet into the stirrups, so that the bar of the stirrup is under your arch, rather than under the ball of your foot, your ankles can no longer flex when the horse moves, which puts an enormous concussive pressure on your knees and blocks your hips. However, the problem is often not the rider jamming their foot into the stirrup, but the foot sliding too far into the stirrup. This tends to happen when the lower leg is too far back, either because the stirrups are too long or the hamstrings are too tight. Regular Pilates can help your hamstrings, whilst shortening your stirrups slightly, will take care of the former.

7. Blocked ankles

If the ankles are blocked, then the knees are blocked, which in turn means the hips are blocked and the horse is restricted. Blocked (or braced) ankles invariably come about by the rider trying to force their heels down. Our ankles should always be soft and supple, so that they are able to flex with the movement of the horse. However so many of us have been taught that our heels should be the lowest point, that it is very common to see a rider forcing their lower leg forward, and thrusting their heel down. And whilst this might make a good defensive riding position it blocks the ankle, which as mentioned above, blocks the knee and the hip.

As already mentioned, it is is relatively easy to place your knee in the correct position by adjusting the rotation of your thigh. However it is much harder to maintain this position easily, without working on the necessary muscles. Attending a regular Pilates class can make a phenomenal difference to your riding.

Many riders avoid doing any lateral movements with their horse. This can be because of fear of doing them wrong and “hurting” their horse, lack of knowledge and not knowing where to begin, or even not knowing why doing such movements are so beneficial for the horse. I often hear riders say they “just enjoy hacking out”, and therefore they have no need for such fancy movements, or from those that “do” dressage that they “don’t’ need lateral movements until they reach Medium Level”. I couldn’t disagree more with these sentiments, I think we should all be teaching our horse lateral movements.

Shoulder-in, along with most of the other lateral movements, are essential tools in helping your horse to become straight and supple, two of the key elements in British Dressage’s Scale of Training and in my mind necessary for the physical well being of the horse. In fact, Nuno Oliviero declared “shoulder-in is the aspirin of horseback riding – it cures everything!”

To me, using lateral movements, is like doing Pilates with your horse. Lateral movements can be used to help correct the horse’s natural asymmetry, to help him become equally strong and supple on both sides – without which you cannot have straightness. They can be used to improve his core and strengthen his back – which are fundamental requirements if you want to ride your horse. And finally they can help your horse learn to engage his hind legs by taking them further underneath his body, which is required if you want to ride in true collection rather than just with “head set”.  Lateral movements help keep your horse balanced and supple whilst only ever schooling or a riding on a single-track encourages stiffness in the shoulders and pelvis and exacerbates your horse’s natural asymmetry. Even if you never ride in a school you can incorporate simple stepping over exercises, such as leg yields at a walk, to positively influence your horse’s basic balance.

Most horses find the lateral movements where the horse is bent against the direction of travel – such as shoulder-fore, shoulder-in, leg-yield-with-bend-against-the-direction-of-travel, and turn-on-the-forehand easier to learn than those where he is bent in the direction of travel – e.g. travers, renvers, half pass, turn-on-the-haunches and pirouette. But don’t take this as gospel, your horse may not have read this note!

If you have never done any lateral movements before, I’d recommend you start with turn-on-the-forehand, and then move on to shoulder-fore or leg-yield-with-bend at a walk. I’d also suggest you start with groundwork, where your weight can’t inadvertently make the movement harder to do, either by working on-line or in-hand. Which one of these methods you chose depends on which you prefer, but which ever method you chose make sure that you reward your horse for the slightest try. Only look for one step initially, don’t get greedy and immediately expect your horse to do a whole side of a school in a perfect 3-track shoulder-in.

These exercises are meant to benefit the horse and help him biomechanically – just as attending a Pilates class helps you. Accept that things might not be perfect to start with and try not to get frustrated with your horse. If you experience difficulties with a movement, it is far more likely that you are asking incorrectly or your horse can’t actually do what you are asking, rather than won’t. Slow the request down and ask for less, such as only asking the front leg to move rather than the whole horse. Over time you will be able to ask and expect more. After all you wouldn’t expect your instructor to ask you to hold a plank for 60 seconds at your first ever Pilates class!

I tend to teach my horses on-line before doing the exercises in-hand but there is no right or wrong way, use which ever method you (and your horse) prefer. The most common mistake to look out for. in any of the lateral movements-against-the-direction-of-travel, is over bending the horse’s neck to the inside, which causes the horse to fall onto his outside shoulder. This can be caused because we have asked for too much bend with our hand or because it is the horse’s hollow side and he has a natural tendency to bend that way. If you are working in-hand you can use your outside rein to prevent the excessive bend and support the outside shoulder, if you are working on-line you need to be able to use your stick to support the shoulder.

Turn-on-the-forehand

This is a super starter exercise which helps engage the core, mobilize the horse’s pelvis and bring a hind leg underneath his body. You will need a cavesson, a single line (such as a short lunge line) or rein attached to the central ring of the cavesson and schooling whip or cane. It is important that your horse is not frightened of the stick or cane, and he is quite happy for you to touch him anywhere on his body with it. If he is concerned and you can’t touch him everywhere, you aren’t ready to do this exercise yet. Equally you should be confident and competent enough so that your horse won’t walk over you, strike you with a front leg or trample you! If you aren’t confident about this – don’t try the exercise.

  • Stand in front of and facing your horse with one hand resting just in front of the horse’s nose holding the single rein or line. The arm should be straight (or slightly bent), so the horse is a couple of feet away from you.
  • If you have mastered the art of stelling, flex your horse’s nose slightly against the direction of travel. The rein should be lying across an open hand rather than held tight. Raising your energy, slowly raise your stick so that it points towards the horse’s tail and is parallel to the ground.  Pulse the stick slightly towards the horse or gently tap your horse on his body with the full length of the stick (shoulder, through rib cage to hip).
  • The moment the horse moves one step away from the stick, drop the stick and reward your horse.
  • The hind leg that is closest to the stick should step under the horse’s body in front of the other hind leg away from the stick.
  • The front leg that is closest to the stick should step in front of the other front leg away from the stick.
  • You are eventually looking for your horse to circle around you with his hindquarters performing the largest circle and you performing the smallest.

There are a number of videos that cover teaching the horse lateral movements from the ground; these include but are not limited to Straightness Training, The Academic Art of Riding and Manolo Mandez. Books that cover the subject include Schooling Exercises in-hand which is published by Cadmos.

When I first started teaching Rider Biomechanics it was perfectly clear to me, standing and watching, whether a rider was sitting straight in their saddle, or collapsing to one side, leaning forwards or leaning backwards. However, it soon became abundantly obvious, that what I was seeing and what the students thought they were doing, were poles apart.  There was a disparity between what the rider’s brain told her was ‘straight’ and the reality that I was seeing. And if I told the student to take their torso forwards for example, they would for a moment in time, but their proprioceptive system (the body’s internal GPS) would tell them that the new position was wrong and would take them back to their concept of straight or alternatively, actual tightness in certain muscle groups would prevent the student from being able to make the changes.

I soon realised that I wasn’t going to be able to make these changes happen by just telling the student to stop doing something, I needed the rider to seethe situation for themselves and to understand how collapsing a left shoulder could cause their horse to drift to the right.  It was whilst trying to find the solution to these problems that the idea of PI, my electronic horse was conceived. Eight years down the line, PI has become an unbelievable successful teaching tool and I now regularly operate Posture Assessment Sessions. Cameras mounted to the side and rear show the rider where their body really is, whilst sensors on PI’s feet show the rider exactly where their weight is being distributed. Faced with both the weight display and a video of themselves on the screen in front of them, the student’s proprioceptive system is proved the liar it is.

If we want to become a good rider, communicate clearly with our horse and not compromise our horse physically, we need to be able to sit in balance. So being able to sit up straight is an essential skill for any rider. At the halt (or in neutral), the rider’s ears, shoulders, hips and heels should align when viewed from the side. When viewed from the front, the horse’s neck, withers and spine should form a straight line, with the rider’s nose, chin, breastbone and belly button.forming a perpendicular line. Viewed from the rear, the rider’s head and spine should also align with the horse’s spine. As I mentioned, being able to obtain this neutral position is essential, if we wish to have clear communication with our horse. But with the student’s proprioceptive system lying to them, finding this “ideal posture” was like searching for the Holy Grail.

Self awareness of one’s postural habits and understanding how it feels to have a neutral pelvis and spine and equal weight in both seat bones is the first step towards correcting poor posture.  Only when one can find a neutral pelvis and sit in balance can one start learning how to use the pelvis and weight in nuanced ways to communicate with the horse.

Most people take their normal postural habits with them when they get in the saddle. If they normally tilt their head to one side when they are standing, then they will do exactly the same thing when they sit on a horse. Because so many of us work in offices or lead sedentary lifestyles, a lot of people assume a slouched ‘computer posture’ with rounded shoulders and a chair seat when mounted, while others overarch their lower backs and virtually everyone sits too far back in the saddle.  Other riders collapse to the left or right, with more weight on one seat bone, or sit with one hip and shoulder in front of the other.

When someone has ridden crookedly for years, that crooked position feels correct even when they can see for themselves just how crooked they are. Correcting the problem requires retraining the brain to understand what really straight and balanced feels like. It is not easy. Whilst the rider sits on PI, we use the weight displays and cameras to work out how the rider needs to adjust their body to bring it in to alignment. Sometimes the rider is able to make the necessary adjustments herself; other times I need to help them find straightness. All too frequently, the rider will be tight in their hips and lack sufficient core strength. Sometimes the pelvis is uneven with one side higher, lower or further forward than the other. Permanently correcting these issues cannot be done in one session, or even on board a horse, but awareness and understanding is the first step. Once the rider understands where the issue is and what causes the problem, they can then work on correcting themselves using Pilates exercises.

The half halt is something that virtually every one of us has been told to do, at one time or another, during a riding lesson. But from running my Posture Awareness Clinics I now realise just how few riders understand how they are supposed to do a half halt or even why they should should be doing it in the first place. I therefore thought it would be a great idea if I could try to explain the half halt in detail, by breaking the half halt down into a What, Why, When and How.

The What and Why

According to the FEI the “half-halt is a hardly visible, almost simultaneous co-ordinated action of the seat, the legs and the hand of the rider, with the object of increasing the attention and balance of the horse before the execution of several movements or transitions to lesser or higher paces. In shifting slightly more weight onto the horse’s quarters, the engagement of the hind legs and the balance on the haunches are facilitated, for the benefit of the lightness of the forehand and the horse’s balance as a whole”.  So basically, to put the definition in to simpler terms, the purpose of the half halt is to help re-balance our horse for a change in pace or direction by getting the hind leg that is on the ground to stay on the ground a little longer and to flex a little more.

So why would we want to help balance or re-balance our horse.  One example might be, that if you were riding a horse that was leaning on his bit and extremely heavy in your hands, by using a series of half halts, you could help shift some of his (the horse’s) weight backwards. Equally, you could be trotting around the arena and want to make a 90° turn, by applying 2 half halts before the turn you can warn the horse that you are about to make a change in direction. You can also use half halts to prepare your horse to go from a walk or trot into canter, or from canter or trot into walk or trot. You can use half halts before asking your horse to extend his gait or asking him to collect more. No wonder instructors keep telling us to half halt!

The main job of the half halt is to increase the flexion of the joints of the hind leg that is on the ground, by using our weight or the weight of the horse’s head and neck to transfer some of his weight back. By flexing the hind leg more and keeping it on the ground for slightly longer, we are able to prolong the weight bearing phase of that leg.

The When

Our aids for the half halt can only work effectively when our timing is correct. As I have already mentioned, as the job of the half halt is to increase the flexion of the joints of the hind leg, a half halt can only be applied effectively when the hind leg can comply with the request.  To understand when this moment is, we first need to consider how our horse moves. Although the rhythm changes with the different gaits the basic premise remains the same. As the horse moves forwards each hind leg in turn reaches forward through the air, touches down in front of the vertical, receives the horse’s weight and flexes at the joints. The leg then passes the vertical, and as the body moves forward the leg extends the joints and then pushes off from the ground to propel the body mass forward.

So as we have said the purpose of the half halt is to flex the joints, it is obvious that the only moment in the footfall sequence that is suitable for the half halt is the weight bearing phase, i.e. between the time when the hind leg touches down to the moment it reaches the vertical. If you apply the half halt when the hind leg is in the air, it is unable to respond to the request and if you apply the half halt when the hind leg is behind the vertical, it is too late as the joints are already extending again and pushing the body forward.  In either of these two scenarios the half halt won’t go “though” as it is physically impossible for the horse to comply.

Even when you get your timing exactly right, the half halt may not go through because the horse finds it difficult to comply. For example if your horse is hollow on his right side, he would carry more weight on his left fore and his right hind would step outside his centre of mass. In a case like this, you need to get that right hind stepping underneath the horse before a half halt can work, so you would need to ask for the horse to leg yield for a couple of strides to the left to get the right hind to step further under before stopping into the right hind.

The How

There are several possible ways or types of aids you can use to apply half halts.

  1. You can use your seat by pulling down with the muscles in your lower back and up with the abdominal muscles located below the navel, which uses your own body weight to load the hind leg and keep it grounded longer.

2. You can use a light stirrup pressure on the same side and at the same time that the targeted hind leg touches the ground. So for example, if you wanted to half halt into the outside hind leg, you could apply a little pressure against your outside stirrup when the outside hind leg touches the ground.

3. You can use a light rein pressure from either rein to take the weight and the leverage of the horse’s head and neck and transfers it to the grounded hind leg.

With all of these aids the pressure should only be held from the moment the hind leg touches down to the time the hind leg reaches the vertical. And if you are using a rein aid, the contact should not be thrown away when the pressure is released.

Half halting using the reins is probably the most common way of doing a half halt. But, unfortunately, too many people apply too strong a rein pressure for too long and then they inadvertently throw the contact away when they release the half halt or even forget to release at all. A way of overcoming this problem, is to think of engaging your core as you close the fingers. As you do so, breathe, draw up and hold—through the small of the back. Let your breath out when the horse obeys and your hand will automatically give again.This will b e felt down the length of the rein and if this is not sufficient, you can raise your hand gently, but only an inch or so.

Students who have the opportunity to have a session on PI, my electronic horse, can actually see for themselves just how hard it is to use their hands correctly to apply a half halt, whilst if they use their back and core muscles in the way described, a slight pressure on the rein on is applied, and then, as they release their back muscles the rein contact reverts to parity. Most students find that if they just use their hands they invariably apply too much pressure on the rein and cannot control the release. Another facet of PI’s programme is being able to try and time the half halt to match PI’s virtual footfall which is shown on the screen in front of you.

As a Rider Biomechanics Coach, I know that the way a rider sits on her horse influences the way the horse moves. Obviously, there are lots of other reasons why a horse may not be moving properly, such as the horse’s own asymmetry or a poorly fitting saddle, but one of the most common reasons is the rider’s position and the way they are sitting on our horse.

The way we sit, or to put it another way, our posture, balance and alignment matters to the horse. Being able to take your pelvis from neutral alignment, apply a subtle weight aid and then take your pelvis back to neutral alignment can make your riding appear more like dancing with your horse. Your aids become invisible; you and your horse appear to be moving as one. A rider with a good seat allows their horse to move to the very best of his ability. Fractional adjustments in your weight will help your horse find his own balance and enable him to move with rhythm and relaxation.

Whilst most of us recognise that there is always room for improvement in our riding and know that we need to make sure we are sitting properly and not compromising our horse’s balance, back or movement, there are others who aren’t so aware. These are the people who pay to have their horse’s back fixed regularly, blame their saddler for not fitting the saddle properly, or change their instructor as regularly as their underwear rather than looking closer at their own position.  Without a good seat, even the best back-person or most superb saddler will not be enough to allow your horse to move with optimal balance and rhythm. Taking regular lessons can help improve your seat but to really improve our riding, we need to be aware of what our body is doing and work on our body’s deficiencies off the horse!

One of the reasons it is so hard to correct poor postural habits is that our body’s proprioceptive system is very good at lying to us. Part of the sensorimotor control system, which is responsible for our balance, the proprioceptive system is actually made up of whole heap of proprioceptors that are sensitive to stretch or pressure in our muscles, tendons, and joints. It is these sensors that help the brain to know just where our feet and legs are, how our head is positioned and whether our torso is erect.

Unfortunately, as I have already mentioned, our proprioceptive system doesn’t always tell us where our limbs or spine really are.  Our proprioception capabilities can become impaired due to injury, but we can also loose proprioceptive capabilities because of poor postural habits such as always carrying a handbag on one shoulder, sitting hunched over a computer or even just because of our age. It is because our proprioceptive system feeds our brain false information that we revert back to our “normal” position so frequently during riding lessons. If you have ever had an instructor tell you repeatedly to straighten your back, look up, square your shoulders or stop leaning back – then the chances are your proprioceptive system is telling you fibs.

To improve our own riding we need to really look at our position and posture, and work out what adjustments we need to make in our body. Self awareness of crookedness is the first step towards straightness and alignment. This is where I find the use of PI (my electronic horse) so very beneficial. Sensitive sensors under PI’s “feet” give continuous feedback of your weight distribution and whether you are sitting with equal weight on each seat bone, leaning too far forward or too far back. The cameras and video footage enables you to “see” in real time just how your shoulder/hip/heel alignment lines up and helps you learn to find what the correct position should feel like. Once you can sit easily in total balance and alignment, PI then allows you to experience how an adjustment of a hip or a tilt of a torso can affect your weight.

Just as we are able to help our horse make postural changes through gymnastic training, we can also help ourselves and retrain our proprioceptive system with the right exercises. If we want our horse to engage his core and stretch his top line, it is essential that we can engage ours! If your spine isn’t aligned and stabilized by strong core muscles and your hips are stiff, it’s going to be impossible for your horse to move correctly!

Pilates classes and courses are perfect for riders as they help improve posture, as well as increasing flexibility in the hips and strengthening the core. In all classes, the alignment of the spine and a neutral pelvis are a key tenet. It is this basic postural principle that can help riders understand where and how to sit in the saddle.

Biomechanics seems to have become the buzz word in the equine industry in the last 10 or so years. Everyone these days is a biomechanics coach, but what does biomechanics really mean and is biomechanics really important to you or your horse?

Lets us look at the meaning first. If we look at Wikipedia, biomechanics is defined as “ the study of the mechanical laws relating to the movement or structure of living organisms”. But what does that really mean and how does that relate to you, your horse or your riding?

In a nutshell, Biomechanics is the science of the movement of a living body, including how muscles, bones, tendons, and ligaments work together to produce movement or are influenced by an outside force such as gravity, pressure or weight.

I like to break Rider Biomechanics into 3 components – the biomechanics of the human, the biomechanics of the horse and finally the biomechanics of the horse and human combination – rider biomechanics.

Basically all horses and all humans are born asymmetrical and as we grow older our asymmetry increases. This asymmetry places unnecessary strains and stresses on joints and ligaments, and if not dealt with can cause real physical problems for both ourselves and our horses.

The Biomechanics of the Horse

Like us, horses are born right or left handed – or more correctly in their case, left or right footed. They have a hollow and a stiff side and naturally carry more weight on their forehand.  Understanding the longitudinal (front/back) imbalance is easy, although this cannot be corrected until the lateral (side/side) imbalance has been dealt with. Understanding the lateral imbalances and indeed working out just which side is hollow and which is stiff can be far harder. 

The actual terms “hollow” and “stiff” have been used for centuries. The term hollow is used to define the side of the horse that is more contracted, whilst the term stiff is used for the side that is more stretched. In more extreme cases your horse can look a little like a banana, with the stiff side being more convex and the hollow side, more concave. This isn’t a major problem if the horse is never going to be ridden but in order to carry a rider without undue strain, the horse needs to develop a strong back, be equally strong and supple on both sides and learn to carry his weight more equally. Therefore the horse needs to be taught how to improve both his balance and straightness – his biomechanics, using gymnastic exercises.  It is only by training our horse’s muscles and straightening him that it is possible to achieve optimum movement, posture and position. A straightened horse will be physically and mentally in balance, symmetrical and supple and be able to carry his rider with ease. This training is often easier to do without the hindrance of a rider and can be achieved by working with the horse on-line, in hand or on the longe.

The Biomechanics of the Human

As I have already mentioned, all humans are asymmetrical. Most of us collapse more on one side, stand with one shoulder higher than the other, have a dominant hip or place more weight on one foot than the other. In addition to our asymmetry, all too many of us are overweight and lack muscle tone which exacerbates the asymmetry. Another big problem for so many of us, is our lack of ability to isolate certain muscles or body parts, so that we use a hand inadvertently when bringing a hip forward or we clench our gluteal muscles (bottom) when doing a half halt.

To remain healthy and certainly to become better riders we need to take responsibility for our own bodies, become aware of our posture, and work to improve our suppleness and balance. Pilates classes (either mat-based or using a Swiss ball) are absolutely perfect to create awareness, increase suppleness and core strength and teach us how to isolate specific body parts.

The Horse & Human Combination – Rider Biomechanics

Finally we come to the horse and rider combination, or rider biomechanics.  Every time we sit on a horse, we influence the way our horse moves, or he influences the way we sit. If we sit more heavily to our left our horse will move to the left. If we hollow our back, our horse will hollow his. Conversely a horse with a hollow back can cause us to hollow ours!  We need to be aware of our position and weight when we sit on our horse, we need to be able to adjust our position at any moment in time to help our horse achieve correct balance and alignment. We need to remember that our seat is the one aid we cannot take away, and do our utmost to make sure that our sitting on our horse’s back becomes as pleasurable an experience for him as riding him is for us.

When I teach, I like to use PI (my electronic horse) initially to help my student acquire “self awareness”. The weight sensors and cameras enable the student to see their own asymmetries and they have the time to learn what a neutral pelvis feels like without having to worry about the movement of the horse. The rein sensors enable them to see just how heavy handed (or not) they are and they can practice “giving and re-taking” of the reins and half halts without any detrimental effects on their horse’s mouth.

Once we become aware of our own, and our horse’s asymmetries we can use “dressage” exercises as physiotherapy for our horse. Changes of bend in motion are really good for developing the lateral suppleness of the horse as well as the suppleness of our own hips.

“The application of one aid alone will never produce an accurate and correct movement. Only the correct application and co-ordination of all the aids can bring about perfection” Charles Harris  – Workbooks from the Spanish Riding School.

An aid can only be effective if it is timed correctly so that the horse can comply to the request. Equally an aid can only be applied effectively if we have an independent seat and can isolate our hands and legs, otherwise the aid gets muffled by a whole lot of “white noise” caused by us inadvertently kicking our horse continuously or using our reins subconsciously. Looked at like that, applying our aids correctly and effectively is not such an easy task. All too many riders just muddle a long – and put bluntly follow the old adage “kick ‘em to go and pull on the reins to stop”. Just how many of us really spend time on getting our aids just right or finding out which combination of our aids our horse prefers? So this month I thought I would write about some fun exercises that not only improve your coordination and timing but can help your horse respond to your leg and rein aids in an increasingly sophisticated manner.

I originally learnt some of these exercises through an article written by George Williams, whilst some of the others are from the Ritters’ Exercise of the Month Club. All of the exercises are supposed to have originated from the Spanish Riding School.

The exercises can help the rider to learn the footfall of the horse and improve the independent use of their hands and legs. The horse benefits gymnastically from the use of circles and learns to relax from the rhythmic application of the aids. The exercises can also reveal what works best for your horse, some of the aids may make him rounder and softer, others may cause a brace. You can use these exercises to help diagnose which combination your horse prefers and how they affect his gait and posture.

To get the maximum benefit from the exercise you really to spend some time  setting out a perfect 20m circle in your school by using 4 gateways to form the quarters. This way you will know whether you are riding a perfect circle, or falling in or out.

The exercises work best for the horse at a trot, which is how they were done at the Spanish Riding School, but they can be modified and done at a walk, if you want to use them to concentrate on your actual timing of the application of the aids.

Exercises One to Six

Ride a 20m circle at a rising trot, rising on the correct diagonal – that is you sit when the horse’s outside front shoulder and inside hind leg are on the ground (if you do this exercise at a walk you need to apply the aid when the inside hind leg is on the ground).

One – Apply the inside rein, by gently and rhythmically closing the fingers of your inside hand, every other sitting moment of the rising trot. You do this over 12 strides so that you will gently close your fingers of your inside hand 6 times. You are looking to see if your horse acknowledges your rein aid by softening his jaw and beginning to flex slightly to the inside.

Wait a few strides before starting the next exercise.

Two – Gently squeeze the fingers of your outside hand every other sitting moment.  You do this over 12 strides so that you will gently close your fingers of your outside hand 6 times. See if your horse responds to this aid by relaxing at the poll. He should not bend or flex outwards. If he does, check that your aid is not too hard.

Wait a few strides before starting the next exercise.

Three – Close your inside calf inwards (the aids should be applied inwards and not backwards, and only the calf should be used) as you sit.  Ensure that you keep your leg long as you use it and do not grip upwards at the knee. Do this over 12 strides so that you will close your calf 6 times. Check if your horse feels more relaxed. Has he softened through the rib cage?

Wait a few strides before starting the next exercise.

Four – Close your outside calf inwards (the aids should be applied inwards and not backwards, and only the calf should be used) as you sit. Do this over 12 strides so that you will close your calf 6 times.

Wait a few strides before starting the next exercise.

Five – Close the fingers of your inside hand and close your inside knee against the saddle as you sit on every other stride. Do this over 12 strides. See if the horse relaxes his shoulder or moves his shoulder away from the nudge.

Wait a few strides before starting the next exercise.

Six – Close the fingers of your outside hand and close your outside knee against the saddle as you sit on every other stride. Do this over 12 strides.

Before continuing with any further exercises you can check if your horse is better able to stretch his topline by giving with the inside hand on every other sit.

Change the rein and repeat on the other rein.

Notice how the exercises have affected you and your horse. You should feel better able to coordinate the aids and your horse should feel softer and more relaxed.  By alternated your inside and outside aids you will have created a network of aids around your horse, so he should feel better balanced and not fall in or out as much on the circle.

Exercises 7 to 10

The next 2 exercises are best done at a sitting trot, although if you struggle with feeling the feet at a sitting trot they can also be done at a walk. The final exercise works best at a sitting trot but can also be done at the sit stage of a rising trot.

Seven – Close the fingers of your inside hand and your inside calf when the inside hind leg is in the air. Do this every other stride, so you repeat 6 times over 12 strides. Does your horse start to step further under with his inside hind leg and soften even more?

Eight – Close the fingers of your outside hand and your inside calf when the inside hind leg is in the air. Do this every other stride, so you repeat 6 times over 12 strides. Do the diagonal aids work better than the lateral aids used in the previous exercise or not as well?

Nine – this exercise is a stirrup stepping exercise and is intended to help transfer the weight from the outside front leg of the horse to the inside hind leg. The stirrup step should be applied as the leg mentioned touches down, between the moment of touch down and the vertical phase.  The sequence is ridden in 6 consecutive strides. Although the aid is referred to as stirrup stepping it is probably closer to stirrup whispering. Imagine gently lowering your toes as though pushing them through soft mud, or feathering a brake pedal. Apply the step with the outside foot when the outside front touches down (shoulder starts to move back) and then again on the outside front. Then apply the step with both your inside and outside stirrups for 2 strides as the outside front and inside hind touch down. Finally apply the step to the inside stirrup for 2 strides as the inside hind leg touches down. This final exercise should improve the diagonal coordination of the horse’s legs and support the swinging of the back.

A good seat is an essential if we want to be a good rider. Every book and every trainer seems to agree on this. How a good seat can be achieved or what constitutes a good seat, is perhaps a little less clear.

Perhaps the first question we need to ask ourselves is why our seat is so important when we ride? The answer is because apart from being our base of support, it is our primary aid. The seat provides an important form of communication between us and our horse. It is the only aid we cannot stop using while we are sitting on a horse; we can stop using the reins, we can stop using our legs but we cannot stop using our seat! If we are crooked either laterally or vertically it WILL affect the way our horse goes. All too many of us don’t exercise nearly enough, long hours sitting at a computer affects the way we sit, add in weak core muscles and tight hips and it is not surprising that so many of our horses have back issues.

Only a supple, well balanced seat allows the possibility of subtle influence. Our ultimate goal should be to be able to reduce our aids down to just tiny changes in our weight and position, so that to anyone watching it looks as though we and our horse are moving as one being.

Unfortunately, for most of us, a good seat doesn’t come naturally. And yet without a good seat we cannot expect a consistent and light contact or deliver our aids effectively. Our hands and our legs are reliant on our seat. Our horses don’t necessarily help us either. It is far, far easier to sit correctly whilst being lunged on a beautifully balanced schoolmaster than riding our own asymmetrically horse that has his own postural issues.  However for most of us, the former isn’t always an option so we have to make the best of what we have.

So let us look first at what is meant by a good seat. Traditionally the classical “good” seat has a three-point contact, comprising the two seat bones and crotch or the two seat bones, crotch and inner thighs. But a good seat surely has to vary depending on the chosen discipline. The answer of course is yes, the seat does need to change depending on your discipline, the movement required and whether you are riding a young, green horse or Prix St George super star. Nor is the seat static, horses are living moving beings and so our seat has to be dynamic not rigid.  But no matter whether we are riding dressage, out hacking, showing jumping or even eventing we need an independent and balanced seat that is supple enough to be able to mirror the movement of the horse!

An independent and balanced seat means that the rider needs to be able to maintain their own balance (self carriage) during upward and downwards transitions and sudden lateral movements (such as turns or even shying) without the use of artificial support (reins, neck strap, saddle), or gripping with their legs! If this is the definition of a good seat, how few of us actually have it? No wonder then that the Spanish Riding School used to expect their students to do 6 months to a year on a lunge without stirrups.

At the very least, our aim should be to allow our seat to follow the horse’s movement smoothly and to keep our centre of gravity in harmony with that of the horse. Only once we have learnt to sit without tension in secure balance can we really follow the movement smoothly and be effective with our aids. An outwardly correct position with tension in the wrong muscles just causes our horse to brace.

Contact is the third building block in the classic German Scales of Training pyramid following after Rhythm and Suppleness (sometimes shown as Relaxation). However, the question of what contact is, or more to the point, just how much contact is needed and how soft or how firm the contact should be, seems to be something that a lot of people struggle with.

According to Gustav Steinbrecht (“Gymnasium of the Horse”) there are 3 gradations in the degree of contact, namely, light contact, soft contact and finally firm contact.  He states that a perfect light contact is only possible when the horse is in absolute balance and is able to carry himself in self carriage. This is basically because balance and contact are essential to each other, so the better the horse’s balance the more consistent and vibrant the contact will be. Conversely, a horse’s balance can be improved by correct contact.

Contact therefore is, in fact, ever-changing – dependent on the balance and the self-carriage of the horse. The more your horse is in self carriage the lighter the contact is. However, as we all know, there are moments during training when things don’t go to plan and our horse isn’t balanced let alone in self carriage and falls on the forehand. And when this happens, he will get heavier in the hand. The important thing here is not to try to fix the problem by pulling on the reins or shortening them even further but to try and help the horse to rebalance himself by using a downward transition or a series of half halts and double checking that you are sitting extra correctly and that you have your core engaged.

In the most basic terms, contact refers to the situation in which the reins are stretched in a straight line between the mouth of the horse and the hands of the rider. To an onlooker, correct contact should appear as an unbroken straight line from the rider’s elbow (which should be held at or above the hip) to the mouth of the horse.  For this to happen, the rider mustn’t have their hands too high or too low but at the appropriate height for the head carriage of the horse. As a rough guide the hands should be held just above and in front of the pommel of the saddle.

How the hands are held is also important to the quality of the contact. They should be held thumb uppermost with the thumbs pointing towards the horse’s opposite ear and slightly downwards as though pouring a pot of tea. Many riders ride with what I call piano hands – where the hands are turned over as if playing a piano. This position prevents riders from being able to really follow their horse’s head with their hands (so the contact is rigid rather than elastic) so they try to compensate for this by opening their fingers in the mistaken belief this makes their hands light. But instead of having a light-feeling contact, they have almost no contact or no feeling and their lower arms can’t give to the horse or be elastic. When the knuckles are almost vertical (thumbs on top) the two bones of our lower arm run virtually parallel (when viewed from above) which permits the hand to be more sensitive and responsive and our contact more elastic.

It is also important to think of riding forward into your hands!  Our hands may move outwards (as in an opening rein), inwards (as in a supporting or indirect rein) or even upwards, BUT NEVER backwards away from the mouth. And yet backwards is probably the most common mistake that occurs!

Equally one should never ride the horse from the front to the back but all too frequently this is what we do. The horse should move forward into your hands. In training for contact the horse must play an active part and the rider’s hand a waiting, passive part. In the original German version of the Scales of Training the word Anlehnung is used, which translated literally means “ leaning to” and not “pulling in”. A rider’s hand that is too active backwards or too hard leads to disruption in the horse’s balance.

Contact gives us the ability to communicate with our horse (and the horse with us). To be correct the contact should feel alive.  If you hold your hands correctly, you feel a connection with your horse. When he chews the bit, you feel a small vibration on the reins. When we have correct contact we should be able to feel a flow of energy, that stems from when our horse’s hind leg touches the ground, travels along our horse’s spine, through his neck and poll and on into the bit and then through the reins to our hand where we feel that energy as a subtle pulse.

Contact should be thought of as a tool for sculpting the horse’s body and guiding the horse. You can use the rein contact to gauge the asymmetry of your horse. For instance if your horse is crooked because the hips and shoulders are not aligned precisely on the line of travel, the rein contact will be too heavy and inelastic on the stiff side (the side which the shoulder falls out from the line) whilst, on the hollow side the contact will be too light. If the hind legs push more than they carry, the rein contact will become heavy as the horse leans on the bit. If the hind legs carry more than they push the horse will stay behind the bit (which may feel light) and avoid the contact. As such, contact allows us to feel what our horse is feeling as any brace or stiffness will have a negative effect on the contact.

To have correct contact you need to sit correctly, using your core muscles to hold yourself in balance. An independent and supple seat is the cornerstone and prerequisite of soft contact. Your arms and legs are extensions of this correct position and are able to retain their position without brace. The upper arms hang straight down to your hips and support and frame your core. In this position, you won’t need to pull on your reins to stay in balance and conversely if the horse leans on the reins, you have the strength of your core to keep you from being pulled forward. Even when we ride with contact, we have to bear in mind that our reins are only a secondary aid. Our seat is the primary aid and it is the engagement of our core that helps the horse to engage his abdominals and find his balance.

The amount of actual ‘weight’ in your hands when taking contact will vary from horse to horse due to conformation differences and as already explained, the “frame” or level of schooling of our horse. The contact feels at its heaviest when the horse is stretching forward and down, becomes lighter as the horse comes into balance and even lighter when the weight starts to shift to the hind legs so that the horse now ‘carries’ himself (self carriage).

Another important factor is we have to learn to accept the contact from the horse as he moves into our hand. So many riders ‘give’ the rein as soon as they feel the horse coming to their hand. If they do this regularly, their horse will never be able to step in to the contact. You need to have a steady hand that ‘accepts’ the contact and closes the circle of aids. If you give away the connection at the same time you ask the horse to step under and carry more weight on his hindquarters the effect is like squeezing a toothpaste tube with the top open,  the energy runs out the front and the horse doesn’t achieve the rounded frame you want.

When the rein contact is loose and floppy the horse cannot feel fine finger communication. Without rein contact he cannot learn to go into the round balanced frame needed for true self carriage. However once the horse can hold a round balanced frame, the reins may be given to him for a few strides to see if he can maintain self carriage.

Too strong a contact will block forward movement and prevent the horse from feeling light communication and whilst it might force the horse’s head into position, he will probably “break” between the second and third neck vertebra (sometimes between the third and fourth), drop his back and trail his hind legs in compensation. Too strong a contact also causes discomfort, numbs the mouth and can damage the nerves.

So what is correct contact?  As already mentioned the reins must be neither too short nor too long but form a straight line between your elbow and the horse’s mouth. It should be the horse who seeks the contact and the rider, in turn, who grants it. In fact the definition of contact given by British Dressage says it all “ the ideal contact is a light, even, elastic feel in both reins and this is achieved by aids from the legs and seat, not the hand”.

Having said all that it is really hard to know just how hard you grip the reins. If you live in the UK my electronic horse, PI, is a great tool for seeing what really happens when you take up the reins. Sensors positioned at the bit record the actual amount of rein contact that you take up and show you just how light or heavy your contact really is. If your contact is more than 1.6kgs per rein the display goes amber to show that your contact is too heavy.

It is interesting to see what really happens when you give a half halt and whether you throw the reins away when you release it. It is also fascinating to see what happens to the contact when we do a rising trot!

So far on PI I have seen as little as 250 grams of pressure per rein to over 4kgs per rein. The contact can differ between the hands too – with the maximum variation between the left and right hand recorded so far being a massive 2.5kgs!  Remember that our contact should be even – assuming we are riding on a straight line and our horse is in balance. Unfortunately, hands that are too strong are all too common. A recent study in Sweden found that their riders took an average of between 1.5kg and a massive 2.5 kg of rein contact in each hand. So much for that light, elastic contact that BD talk about!


It has been a couple of months since I last wrote my last article, as apart from being on holiday and spending spent some quality time with my own horses, I have been thinking long and hard about what this article should be about. Then I had one of those light bulb moments – both my horses had given their all the other morning, Abee on line and Yafee at liberty and we were having a group scratch – when I suddenly realised that despite writing numerous articles about correct biomechanics, groundwork and riding, I had never written about the most fundamental requirement in horsemanship, relationship.

Of course, by the very nature of the word, everyone has a relationship with their horse. After all any 2 or more beings have a relationship, as the word means nothing more or less than how two (or more) beings connect. So, even if your horse hates you and you hate him – that is a type of relationship. However, that is not the sort of relationship I had in mind. From my perspective the relationship that I want with my horse and that I am referring to as being one of the foundation stones of true horsemanship, is one that is based on trust and respect, where 2 beings WANT to be with each other. A relationship that is truly two-way, where I respect my horses space and take his point of view into consideration and he respects my space and takes my view point into consideration.

If I am honest, I have really only had this type of relationship with my own horses within the past 15 years, despite the fact that horses have played a major part in my life for over 60 years. I had always considered myself a “horse-lover” and would have argued until I was blue in my face that I loved my horses, but it was probably riding that I really loved, rather than the individual horse. When I was a child I dreamt of having a relationship like Joey had with Fury or the young boy had with The Black.  Then I lost that dream, that was fiction, it wasn’t the way real horses behaved. Why should they? After all, I didn’t consider if my horses were really happy with their lot  – whether they liked competing, were frightened of trailers or liked jumping. I just expected them to do what I wanted them to do, when I wanted them to do it – and under no circumstances to try and tell me what they were really thinking or feeling – if they did they were being naughty. After all it was totally “normal” to put a martingale on a horse, use a stronger bit, use spurs or have a horse that was hard to catch, or perhaps difficult to load! It still amazes me to this day  just how blind I was.

If I really want to do amazing things with my horse – to have (in the words of Bent Branderup) “two spirits who want to do what two bodies can do” then I need a superb relationship with my horse as my foundation.  To get this relationship takes time and effort – we have to put aside our ego and appreciate that the horse is as important as we are! Fortunately with horses, it is never too late to build the sort of relationship to which I am referring. They are the most amazingly forgiving creatures and even if you have had a rocky relationship with your horse to date, if you are prepared to invest the time and effort and to start to listen to your horse then you can change that relationship around.

Obviously your safely is of paramount importance. So if your horse is aggressive towards you that needs to be dealt with first  – perhaps even consider calling in a professional to find out why. Most horses aren’t naturally aggressive; so if they are aggressive it is normally caused by pain or fear.

The next step is to spend some undemanding time with your horse – quality time from your horse’s perspective. Go sit in the field with him – and let him come to you. Learn to read his body language, how to observe, and what to observe. Start to be aware of the smallest signs – awareness leads to feel.

If he doesn’t come up to you don’t worry, it might take time ( several or even numerous visits). Spending undemanding time will help your horse gain trust in you and enable you to reflect on what you are really seeing and feeling rather than doing. If you really struggle with “being in the now”, take a good book and just observe your horse occasionally. When your horse does approach, do nothing – let your horse take the first step, touch or whatever, and just be. Don’t scratch or stroke unless you know that your horse really likes it. The time you spend with your horse without doing or expecting anything is time well spent – you will “feel” each other better and understand each other more.

Once your horse is comfortable with coming to you, then your next step is for you to approach your horse in the field. Do just that and only that, walk up to your horse; treat, scratch or do something your horse likes – then walk away. It doesn’t matter if you walk away and sit down or if you walk out of the field completely. You are still totally undemanding of your horse. Do this for a few days, does he start to want to stay with you? Then think about taking your horse out for walks – gentle ambles along the lanes – going from one grazing patch to another.

One you have worked on the basics of the relationship – it is time to strengthen that connection by learning and using a new language, the horse-human language. This isn’t just a “Natural Horsemanship” concept –   communication is the foundation for good horsemanship!

Body language is the key to you understanding your horse and your horse understanding you. Start to think about what your body is saying to your horse, are you applying too much pressure? Is your message congruent? Is your primary aid (body) at odds with your secondary aid (rein/whip)? Learn to read what your horse is saying to you – the head turned away, a relaxed neck,  a high head, a twitch of an ear, a wrinkled nose, a tail swish – all mean something. Learning to “speak” and “read” takes time and effort. If you need help ask a professional for a few lessons as this can help speed up your learning process and stop you making some elementary mistakes.

Once you have the basics in place you can continue to develop your communication skills and relationship with training your horse, either on the ground, in the saddle or a combination of the both.


Last month I wrote an article about Starting Groundwork to improve your communication with your horse and help to gymnastise his body by using basic leading exercises. This month I want to take you a step further in your amazing journey of using groundwork exercises.

If you tried the exercises mentioned in the previous article you will have found that both you and your horse have an “energy bubble”. This bubble pretty much defines your personal space.  Push on the bubble and you (or your horse) will either move away or react (possibly aggressively). As you progress with these exercises you need to learn not to push against each other, and to learn just how much space you each need so that you can keep the appropriate distance from each other, where you are both comfortable. You need to be able to walk in balance next to each other, to stop and start as one. When all this is in place it will feel as though you have a joint bubble, one in which both you and your horse are comfortable.

Once the basic leading exercises are reasonable well established you can move on to the continuation exercises defined here, learning how to refine your body language and speed up the reactions of your horse. This is when you start to “dance” together as you move your joint bubble forwards, backwards and sideways.

Probably one of the most important things to remember about groundwork is that your body is your primary aid. The rein, the stick, and your voice are all secondary aids. Basically primary aids cannot be taken away (unless you remove yourself from your horse’s presence), secondary aids can be taken away or not used. In an ideal world your horse responds to the primary aid and the secondary aid is only used if further explanation or refining is required.

Using your primary aid you can start to ask for more engagement in your transitions. When you ask for a stop, try tilting your pelvis by “tucking your tail between your legs” to prepare your horse for collection. Then ask for just one step forward, stop and then one step backwards with your bod by taking your weight slightly forward and then backwards, only supporting with your stick if necessary. Remember if you want engagement you need to engage your body too! When this is going well, you and your horse can start “rocking” together. Whilst in a halt see if you can move the weight of both you and the horse forward and then backwards, so that you slowly start swinging front, rear, front, rear.

Now start playing with extension and speed. Can you increase the pace a little and lengthen your stride and get your horse to emulate you? Can you reduce the speed and have your horse slow down too? Try this using only your primary aid (body language) and variations of your energy level. Try walking slowly for a couple of steps, then stop, go forward a step, stop, back up five steps, stop, stride forward, slow right down etc. etc. Can you and the horse walk at the same pace? Your left leg is equivalent to the horse’s left hind leg and your right leg is equivalent to the horse’s right hind leg. How big or small do your steps need to be to match your horse, and once you can match him, can he match you?

Once all this is going well you can start to ask your horse for correct shape which means introducing stelling and bending. It is normally easier to start this exercise on a small circle – something like a 10m  volte. You will need to be on the inside of your horse, so that you are on the smaller circle and your horse on the outside. As always we need to explain to the horse what we want with our primary aid, our body. So if we want our horse to bend, then we need to bend in our own body and if we want our horse to soften and give us stelling, then we need to be relaxed in our own neck and jaw line.

Standing beside your horse try relaxing your neck and flexing your head slightly to the inside, can you transfer this movement to your horse?  Probably not to start with; but if you can’t, don’t worry. Support the stelling of your neck and jawline by touching the back of your outside hand at the girth and then, if you still need to clarify things a little further to your horse, do so by briefly closing the fingers of your inside hand on the rein (small impulse).  The moment that your horse softens and flexes at his throatlash – reward him. Repeat this exercise at a standstill until your horse relaxes and softens and offers stelling easily and willingly.

Now turn your shoulders slightly towards the middle of the circle, to show your horse the right bending with your body and start walking. Remember you need to keep a small stelling in your own neck. As you walk on the circle you can ask for the inside hind leg to step forward and under the point of mass with your stick. Once the exercise is easy on one rein, change the rein and try it the other way, and then add in transitions.

Then when all the above leading exercises work well in a walk, try them all in a trot.

Remember

Collect by “tucking your tail between your legs” in your own body.

Rock together, forwards and backwards.

Vary the speed, even in trot.

Ask for stelling and bending in your horse by finding bending and relaxation in your own body.

I have written a lot recently about how we can use groundwork to help correct our horse’s asymmetry. Gymnastic exercises done in hand or on line help strengthen the horse so he can carry us, the rider, without detriment to his body. This is something that any horse benefits from, especially those that for some reason have difficulties under saddle. These difficulties could include falling on the forehand, poor top line, difficulty in stepping under with a hind leg, over bending at the base of the neck or falling in or out on circles.

However before we can start gymnastising our horse with the appropriate exercises, we need to have some basic leading skills in place. There are numerous ways you can work with your horse on the ground: these include walking backwards in front of the horse, walking forwards by the shoulder of the horse, walking behind the horse, using one rein or two or on the lunge. Probably the simplest way for the human to start is at the shoulder of the horse. But we need to have some basic skills and communication with the horse in place to do this properly. You cannot work on your horse’s body if you have to drag your horse along by his lead rope or are in danger of being towed behind him at high speed.

You won’t need any fancy equipment to try these exercises, although a French link cavesson or rope cavesson are ideal. If you don’t have a cavesson you can use your usual head collar or rope halter. You will also need a short lunging line or lead line (10 to 12 ft), or a rein with a clip at one end. Finally you will need a dressage or schooling whip (4ft or so) or a natural horsemanship stick.

Exercise One – Leading your horse from his shoulder

This simple exercise is fundamental to any work you wish to do. Can you walk with your horse, shoulder to shoulder on both sides of the horse? Place yourself by your horse’s shoulder with the rein or line in the hand further from the horse and your stick and the tail of your line in your hand that is closer to his shoulder.  Don’t wrap the rein around your hand, and carry the tail of the line in loops. Be careful that you don’t drop the tail of the rein so it trails behind you, as it could get caught around either your legs or those of your horse. The hand that holds the rein should be loosely closed with a slight loop in the line between your hand and the horse. Now start walking. In the beginning you may need the support of a fence to stop the horse falling out. You need to be able to walk together and stop together. Walking together does not mean that you walk away and drag the horse along by pulling on the rein, it means that you both take the first step together, at the same time. You must clearly demonstrate in your body that you want to move forward, so bring your point of weight forward and lean slightly in the direction that you want to go. If your horse doesn’t walk off with you, slow down, and use the whip to tickle your horse on his belly. Walk a couple of strides and then prepare to stop. Don’t stop too abruptly. Prepare for the halt by using a gentle half halt with the rein when the front leg closest to you touches down. Then the next time the leg touches down, offer another little half halt, exhale, sink down a little in your knees, tuck your tail bone under and lean your upper body slightly backwards. If the horse does not want to stop, bring the whip in front of the horse and then if necessary use the whip (to tap) on the horse’s chest. Don’t pull on the rein. It is important to remember that the rein does not regulate the horse’s speed and a half halt is about rebalancing!  Once you can start and stop easily from one shoulder, repeat the exercise at the other shoulder. It can be surprisingly difficult to do this from the right.

Exercise Two – Turns

Once you can start and stop on a single track along the fence, you can leave the outside track and start working on the various patterns that will help with the gymnastising of your horse.  However before you can begin to do circles, figure 8s and serpentines you need to be able to turn your horse to the left and right whilst still leading from the shoulder. Initially you need be extra clear about your intentions in the turns. So, assuming you are leading from the left and want to go to the left, turn your body clearly to the left so that you are turning away from your horse and allowing room for your horse to turn. Weight your left leg a little more and turn – hopefully together. If you want to go to the right, turn your body towards your horse, lift the rein towards the horses head and your whip hand towards his shoulder. Weight your right leg a little more and if necessary bring your whip up and forwards towards the horse’s head to help get the turn.

Exercise Three – 10m Circles

Once you can turn easily, you can start more complex patterns. Begin with a 10m circle on the left rein. Circles (when done correctly) are very good for balancing the horse and softening the inner side of the horse by stretching the muscles on the outside of the horse. Your horse should be on the outside of the circle with you walking a slightly smaller circle. If possible try timing your footfall to your horse’s front legs – left leg, left fore, right leg, right fore. Find a tempo in which you can both work and walk in a relaxed fashion and when you are happy with the circle to the left, stop. Change sides and try a circle to the right. Try and be as precise as possible with your circle. I would suggest that you measure your circle carefully and put out markers at 12 ‘o’ clock, 3 ‘o’ clock, 6 ‘o’ clock and 9 ‘o’ clock so that your circle is accurate and doesn’t inadvertently become an egg. This way you will be able to tell if your horse starts to drift out on one rein (that will be towards his stiff side). Once your circles are firmly established you can try spiraling in and out. To spiral in, weight your inside leg a little more and turn your shoulders slightly in, to spiral out, weight your outside leg a little more and turn your shoulders slightly out.

Remember

Reward often. Show appreciation and tell your horse he is doing well. Focus on using your body language to move the horse where you want.

Start together – lean slightly forwards.

Stop together – exhale, sink down in your knees, tuck your tail and lean slightly backwards.

The whip regulates the speed if your body language is not enough. Increase the speed by using the whip where your lower leg would be if you were riding. Decrease the speed by showing the whip in front of the horse or on the chest.

Do not hang on each other. Respect the personal space of each other.

All new movements are unfamiliar and strange to the horse at first. He therefore needs time to understand what it is you want him to do and how to do the movement. You may have to stop frequently and give the horse a chance to process the last steps and to prepare for the next ones.

These exercises are just the start – as you continue you will refine your body language and speed up the reactions of the horse. You will be able to transfer your own relaxation and softness to the horse. Then you can start dancing together.